What is Red Velvet Cake?
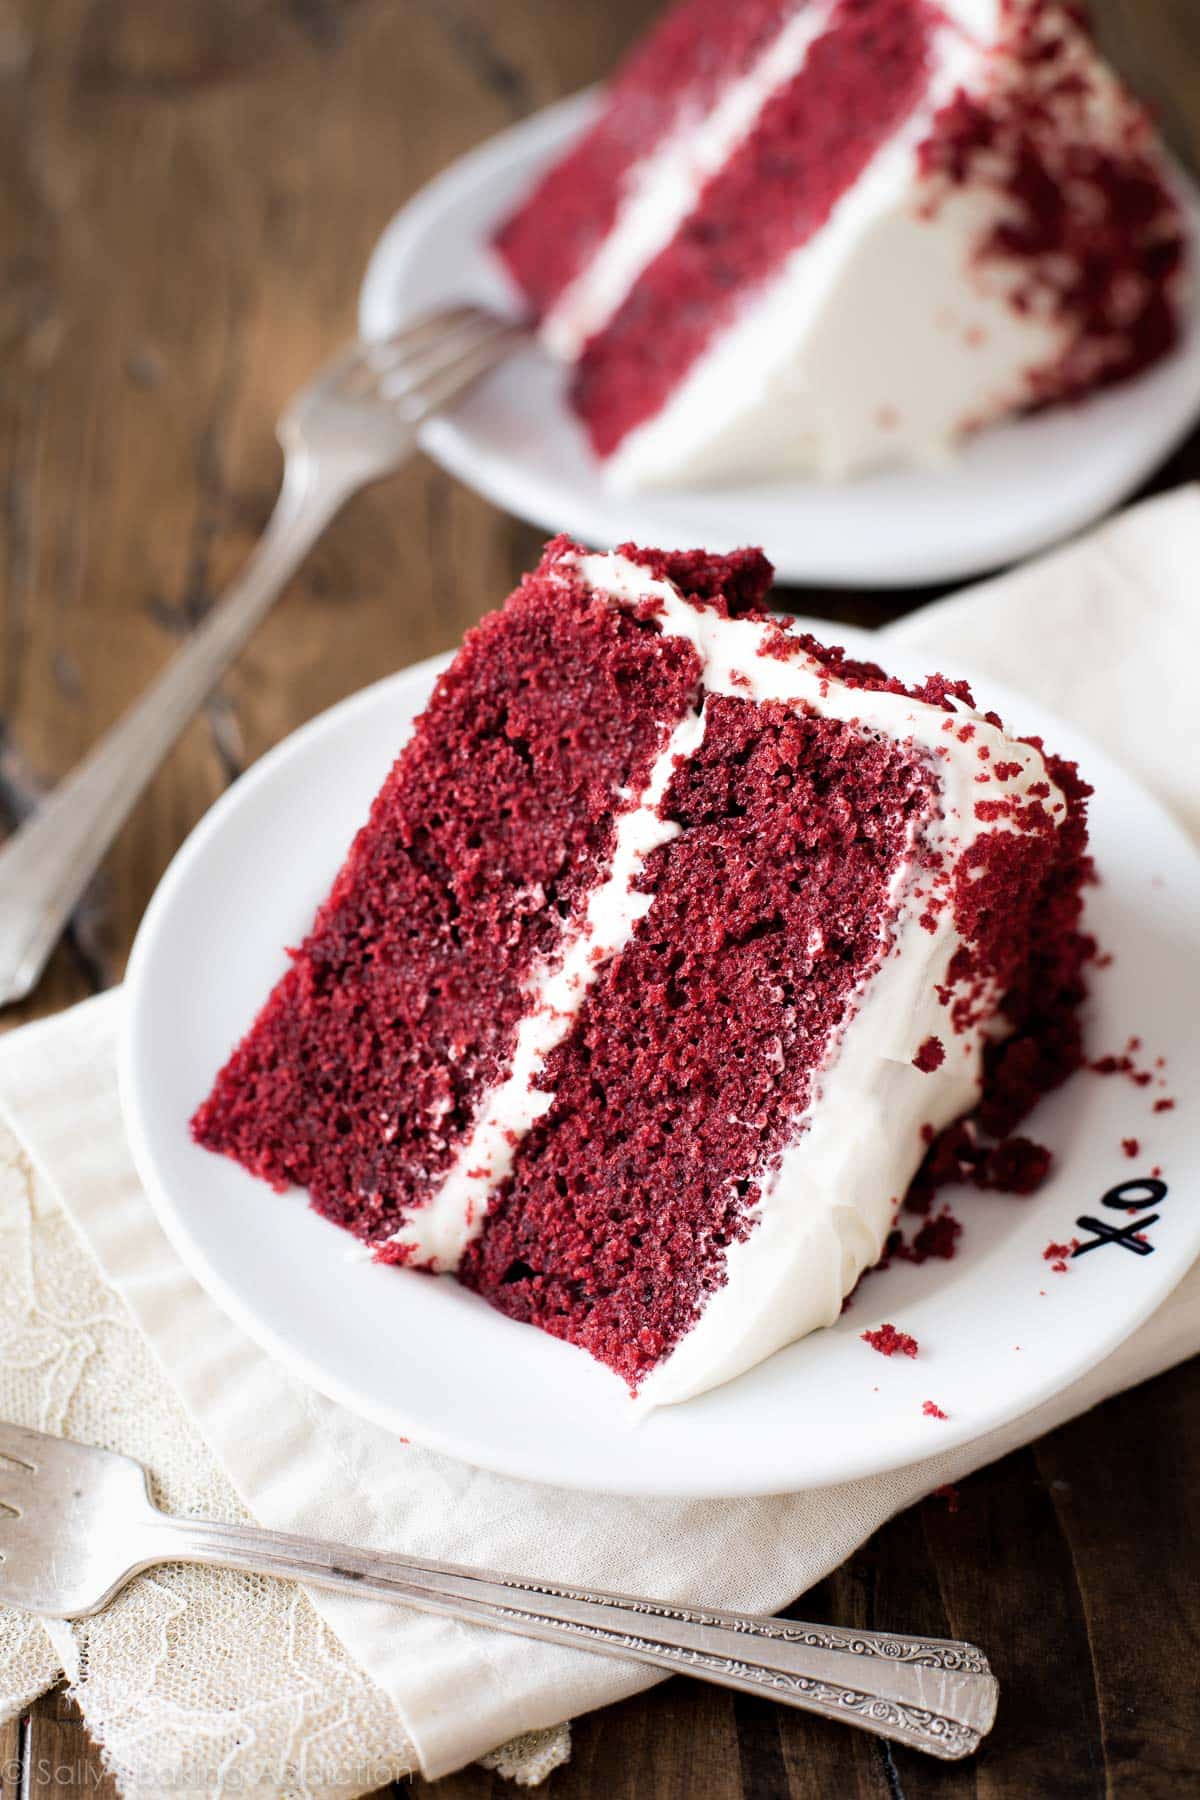
Aside from being a red bundle of joy and ecstasy. Red velvet cake is a vanilla cake with a few teaspoons of cocoa powder and crimson food coloring giving it a red appearance. It's my personal favorite cake and go-to pastry when attending a party! With this recipe, we'll be adding something totally unconventional which is vinegar! The acidity of the vinegar and buttermilk adds a tanginess to the batter that balances out the sweetness of the traditional cream cheese butter icing. The cake crumb is extremely fine, delicate, and silky which is perfect for any palate! This recipe is surely to impress anyone you offer this cake to!
 The ingredients you'll need are the following
Red Velvet Cake
3 cups (354g) cake flour (spoon & leveled)Cream Cheese Frosting
The Guide of the BEST Red Velvet Cake:
2. In a large mixing basin, whisk together the flour, baking soda, cocoa powder, and salt. Place aside.
3. Beat the butter and sugar together on medium-high speed, about 1 minute, with a handheld or stand mixer fitted with a paddle attachment. With a rubber spatula, scrape along the edges and up the bottom of the bowl as needed. Beat the oil, egg yolks, vanilla essence, and vinegar for 2 minutes on high. (Set the egg whites aside.) Using a rubber spatula, scrape along the sides and up the bottom of the bowl as needed.
4. On low speed, alternate adding the dry ingredients with the buttermilk in 2-3 additions. Just until mixed, add your preferred amount of food coloring. 1-2 tablespoons gel food coloring is what I use. Whisk or beat the 4 egg whites on high speed for 3 minutes, or until fluffy peaks form as seen above. Fold gently into the cake batter. Silky and somewhat thick, the batter will be.
5. Divide the batter among the cake pans. Bake for 30-32 minutes, or until a toothpick inserted in the center comes out clean and the tops of the cakes spring back when gently touched. Bake the cakes for a few minutes longer if moist crumbs on the toothpick indicate that they require it. However, don't overbake the cakes or they'll dry out. Remove the cakes from the oven and lay them on a wire rack to cool fully. Before icing and assembling the cakes, they must be entirely cool.
6. To make the frosting, beat the cream cheese and butter together on medium-high speed for 2 minutes in a large mixing bowl with a handheld or stand mixer fitted with a whisk or paddle attachment. Combine the confectioners' sugar, vanilla essence, and a sprinkle of salt in a large mixing bowl. After 30 seconds on low speed, move to high speed and beat for 3 minutes, or until totally blended and creamy. If the frosting is too thin or too sweet, add additional confectioners' sugar or a touch of salt. Soft, but not runny, frosting is ideal.
7. To assemble and frost the cakes, slice a small layer off the tops using a broad serrated knife to produce a level surface. Discard or crumble on top of the completed cake. 1 cake layer should be placed on a cake stand or serving dish. Frost the top of the cake evenly. Spread the remaining icing over the top and edges of the second layer. For the frosting, I always use an icing spatula and a bench scraper.
8. Before slicing, chill the cake for at least 30-60 minutes. When cutting the cake, this helps it keep its form.
9. Refrigerate leftover cake securely covered for up to 5 days. Cake layers, frosted or unfrosted, can be frozen for up to 2-3 months. Refrigerate overnight and bring to room temperature before decorating or serving.
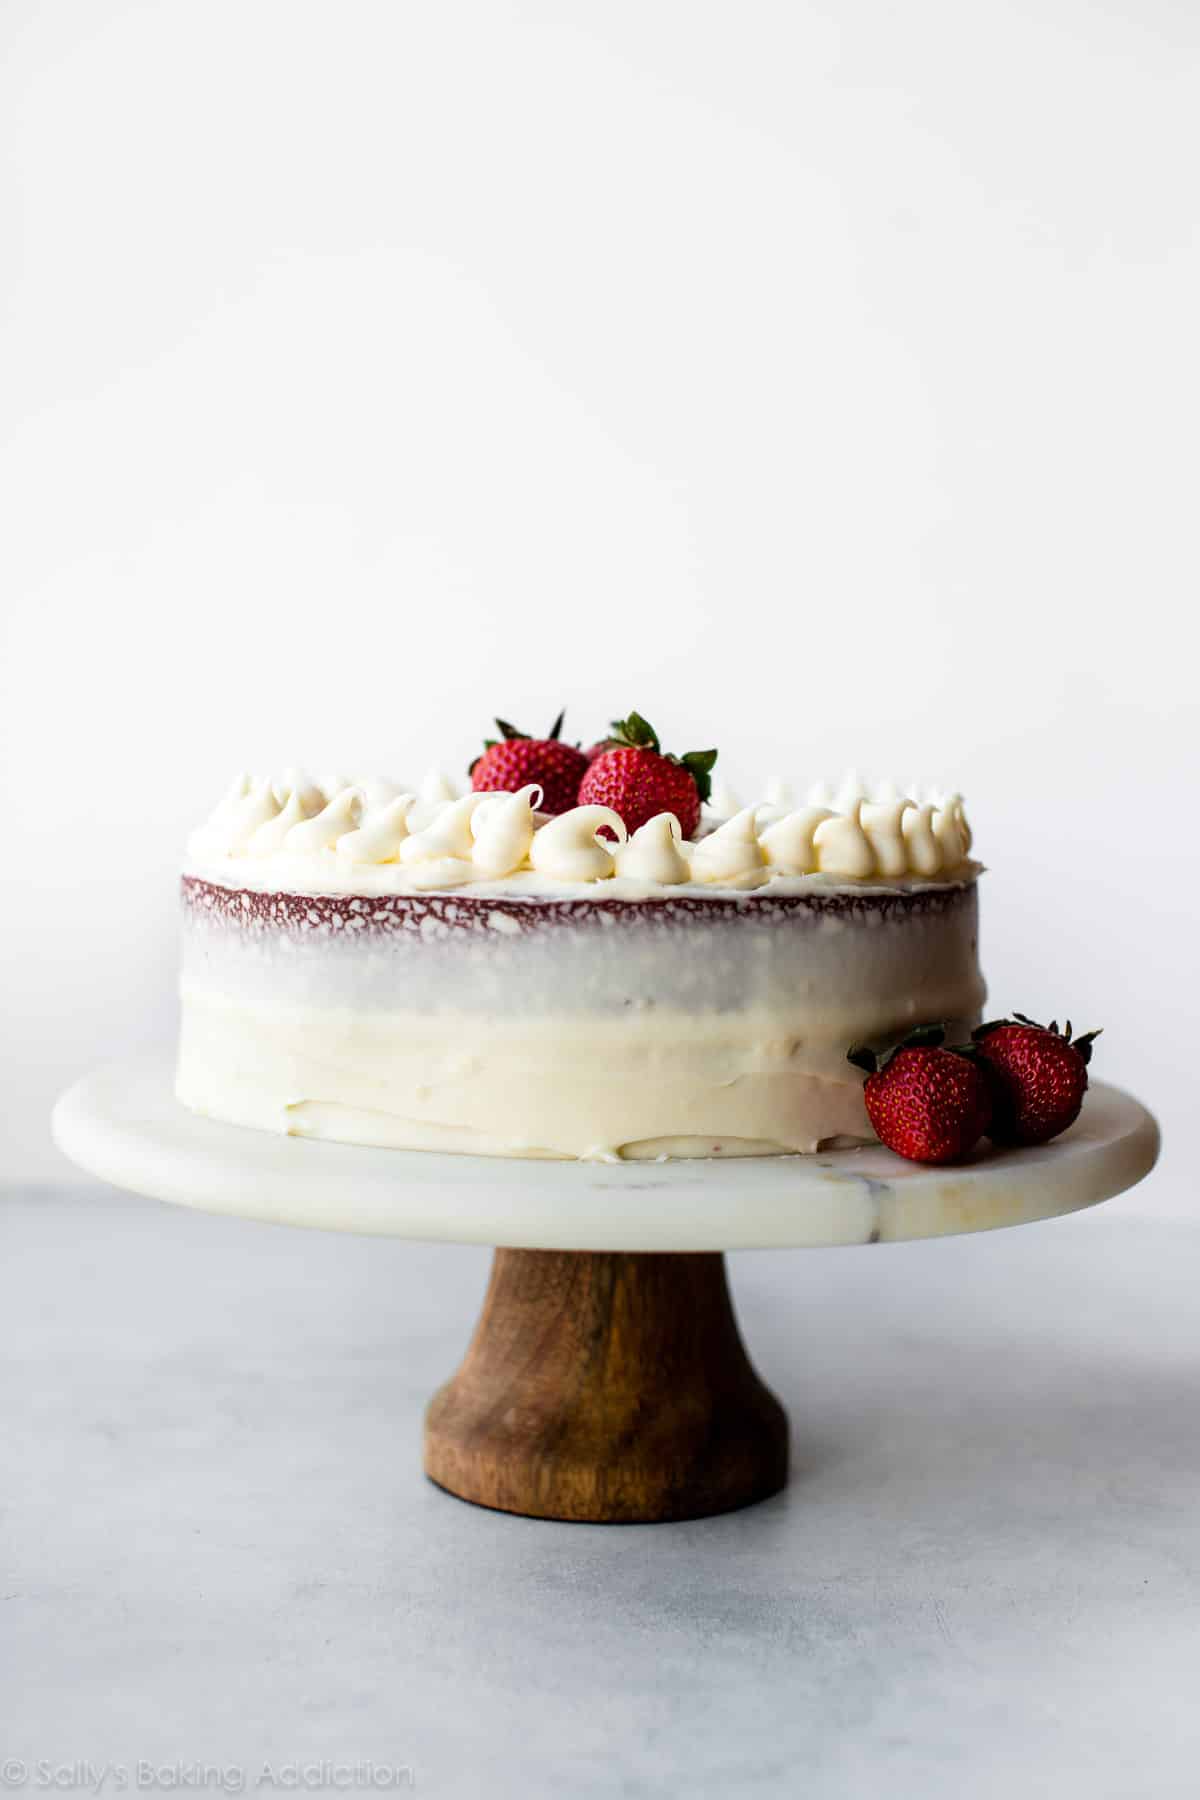
At the end, I mostly like to add strawberries, roasted almonds, vanilla chocolate, or caramel drizzles. Either way, it's totally up to you! This cake recipe is tested and proven by yours truly! I swear you will never get embarrassed with this treat! Now, get your ovens preheated and make the best red velvet cake ever!
Comments
Post a Comment